tutorials: mapping gamut in Photoshop
You will need:
- an image file you would like to analyze
- a color wheel image file
- Adobe Photoshop
1) Open the image you would like to analyze in Photoshop.
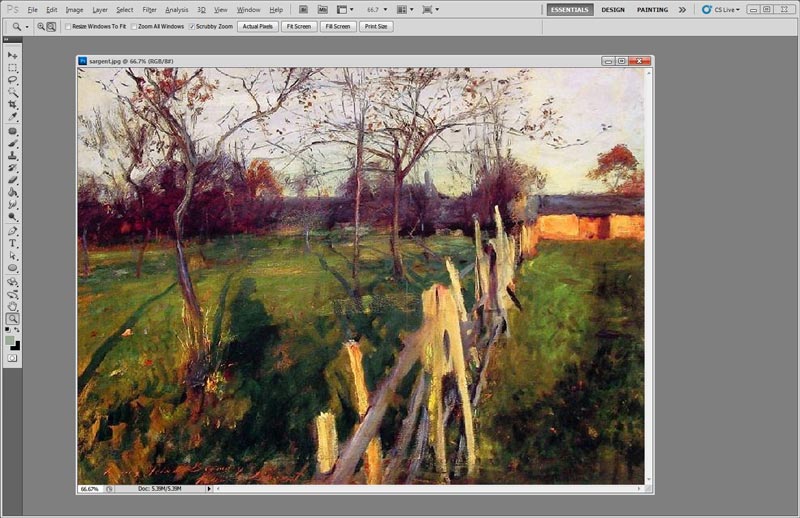 Home Fields | John Singer Sargent | oil on canvas | 1885
 2) Select -> Color Range...
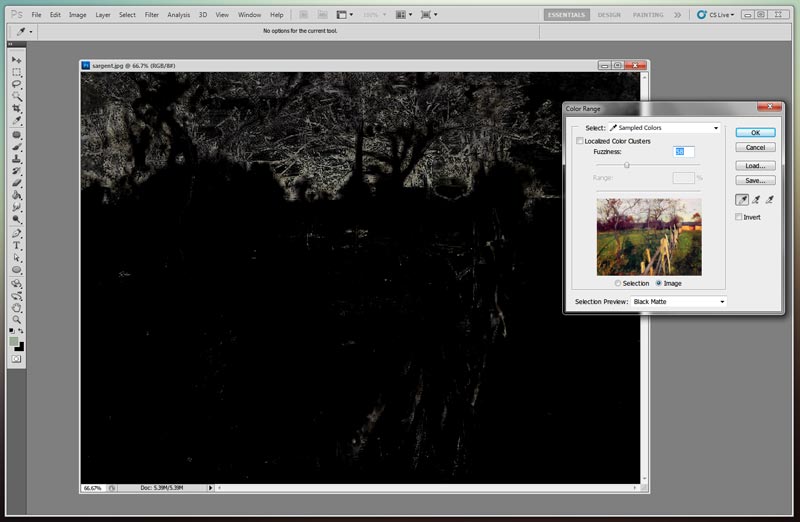
3) Use the eyedropper with the plus sign next to it (circled). Click and drag around the image. This selects all the colors in the image as you drag over them. Continue until all colors have been picked up. Check "Invert" and use a black matte to make it all easier to see.

4) Click "Save" to save your color range as an .axt file. Once the range is saved, you can click OK or Cancel on the Color Range dialog box, it doesn't matter because you are done with that for now.
5) Open your color wheel. I'm using a YRMB wheel.
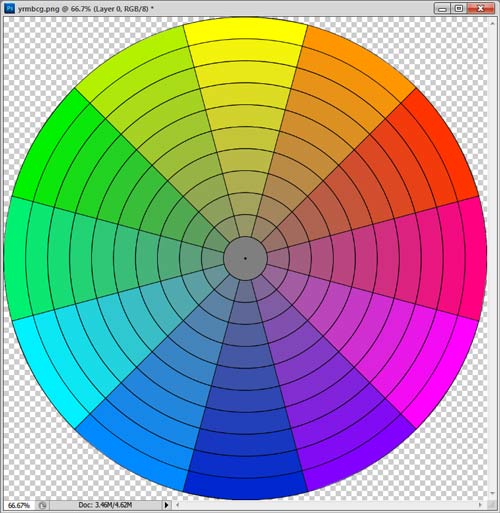
6) Select -> Color Range... Click "Load" and load the .axt file you just saved.
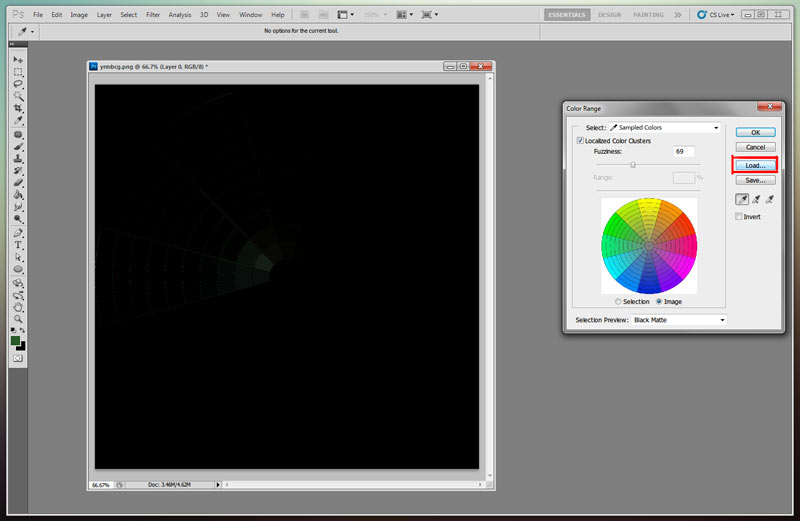
7) Make sure "Fuzziness" and "Range" are both set to 0, and that "Invert" is not checked. Now you can see the gamut!
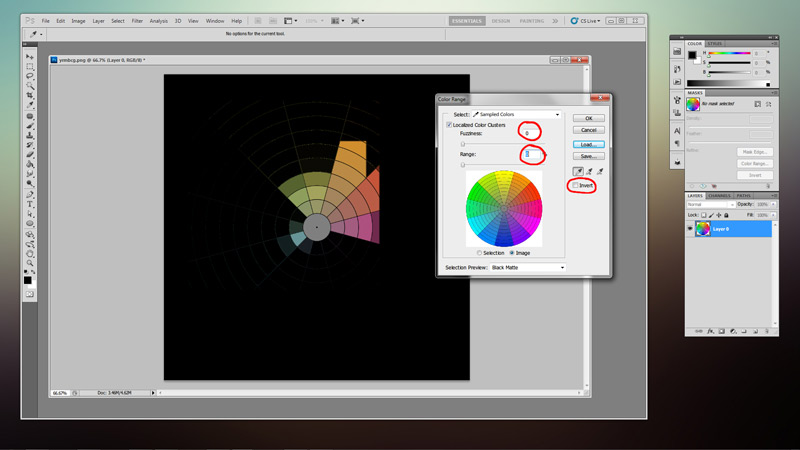
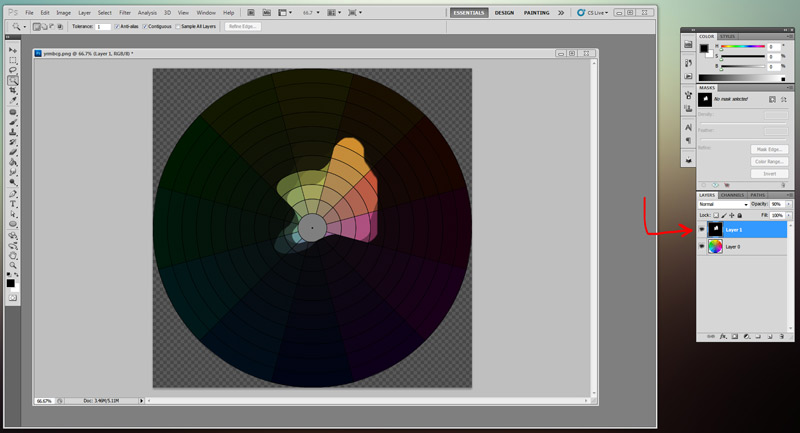
8) Optional: click OK to select the color range, then invert the selection. Make a new layer and fill your inverted selection with black. Run a filter on the layer such as blur or median to make the hole smoother. You can make as many of these mask layers as you want, and name each one ("Zorn Palette," "Orange and Green", etc.).
Acknowledgements:
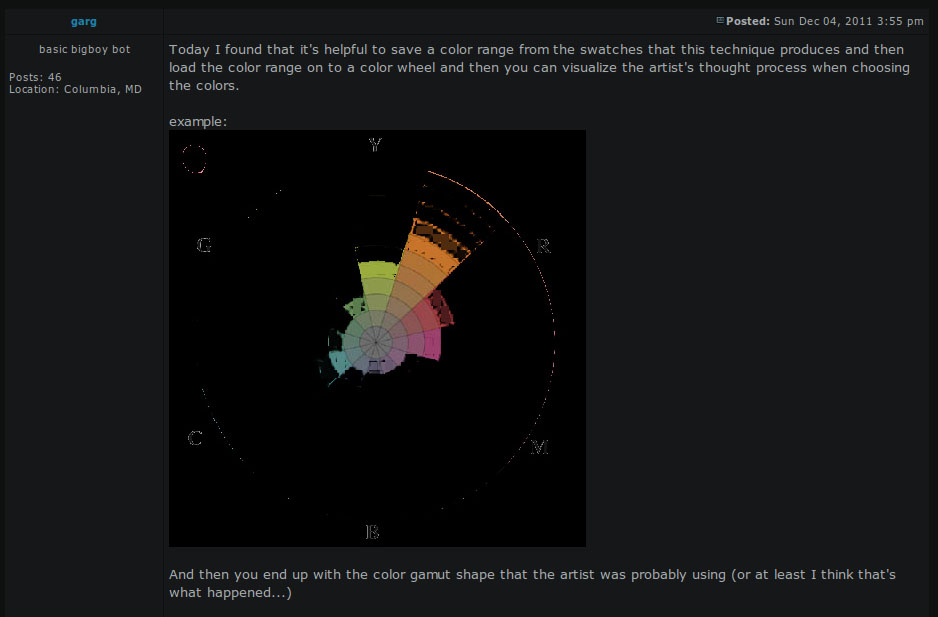
This particular technique comes from user garg on the Apedogs.com forum. This tutorial is just a walkthrough of that process.
The gamut mapping concept itself comes from James Gurney, both on his blog, and in his book, Color and Light. Everyone go buy this book.