tutorials: separating line art in scanned drawings
1) Open your scanned drawing in Photoshop.
This process will work better with inked images than with plain pencil.

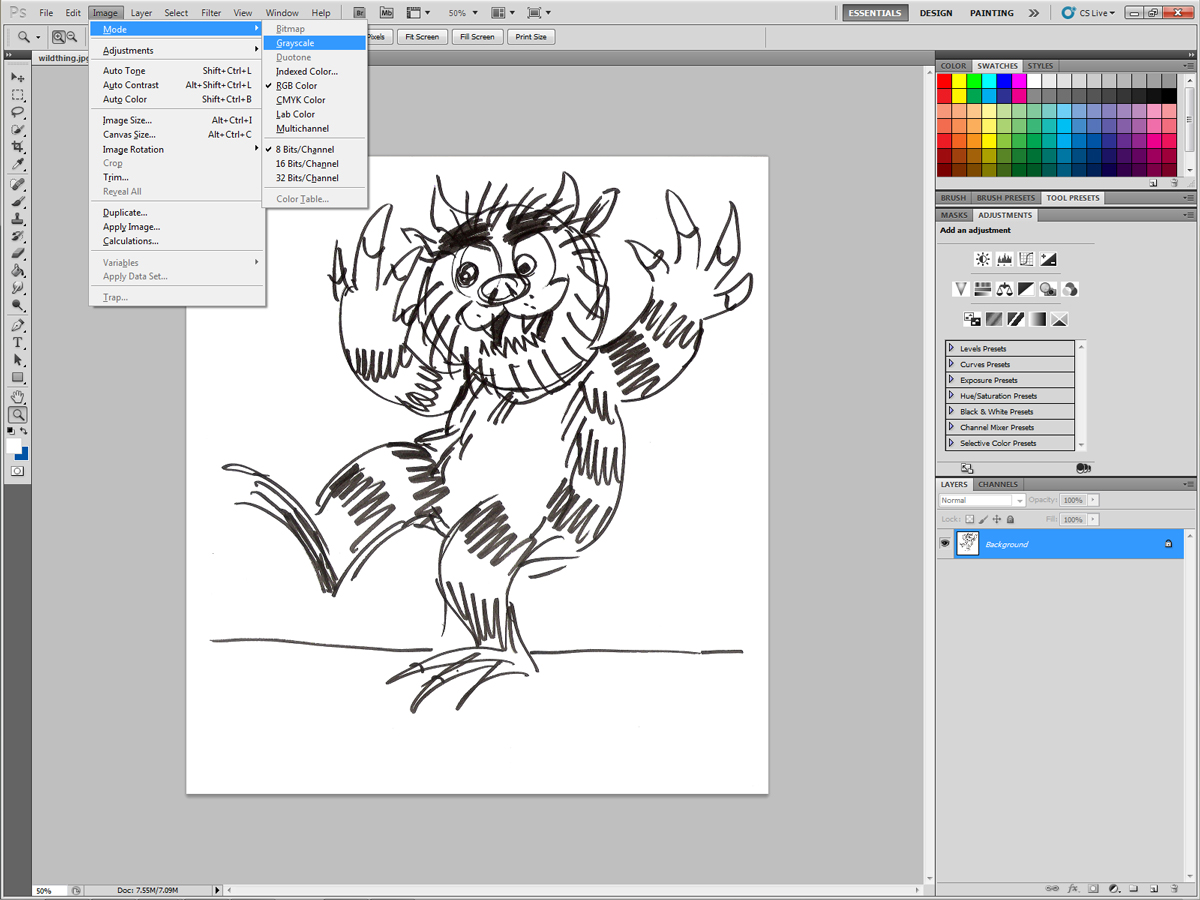
2) Image -> Mode -> Grayscale
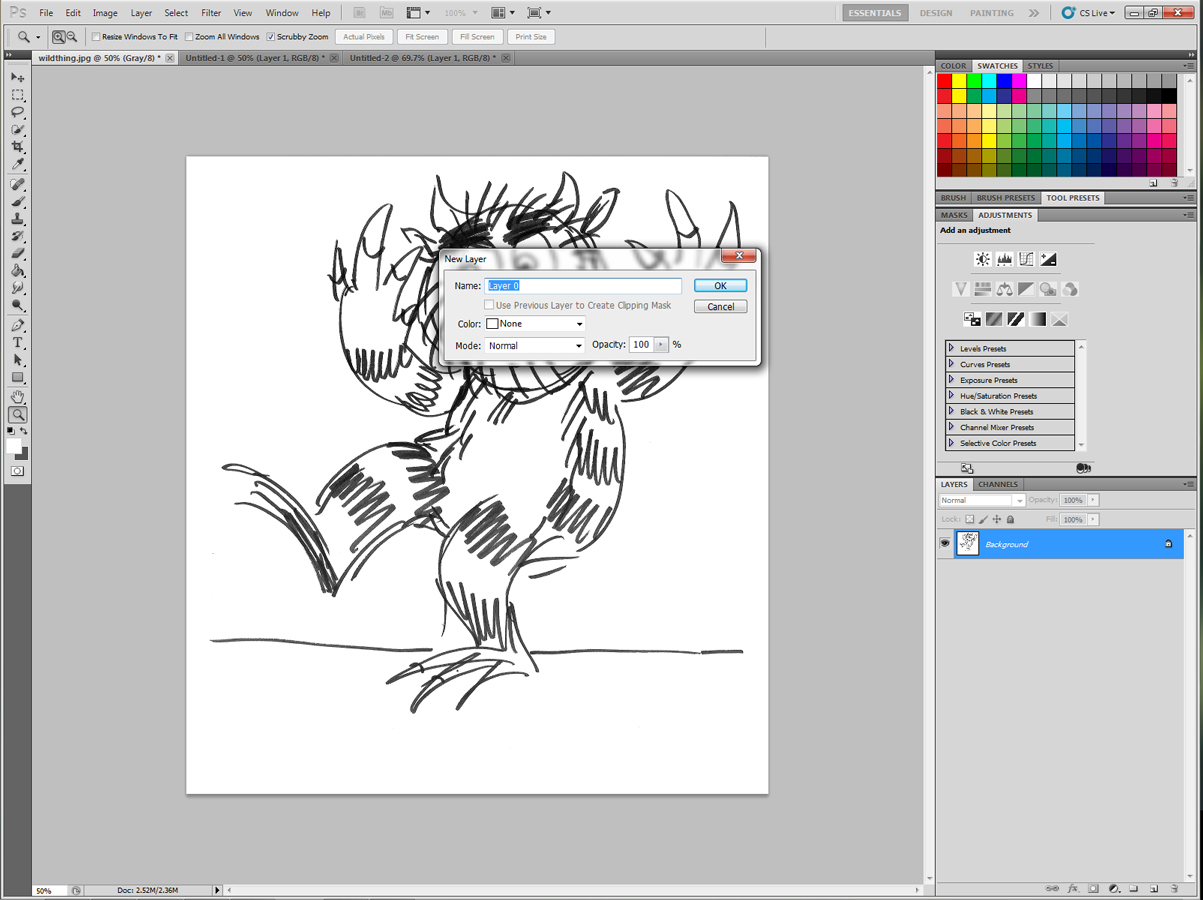
3) Double-click on Background layer and press OK to turn it into Layer 0.
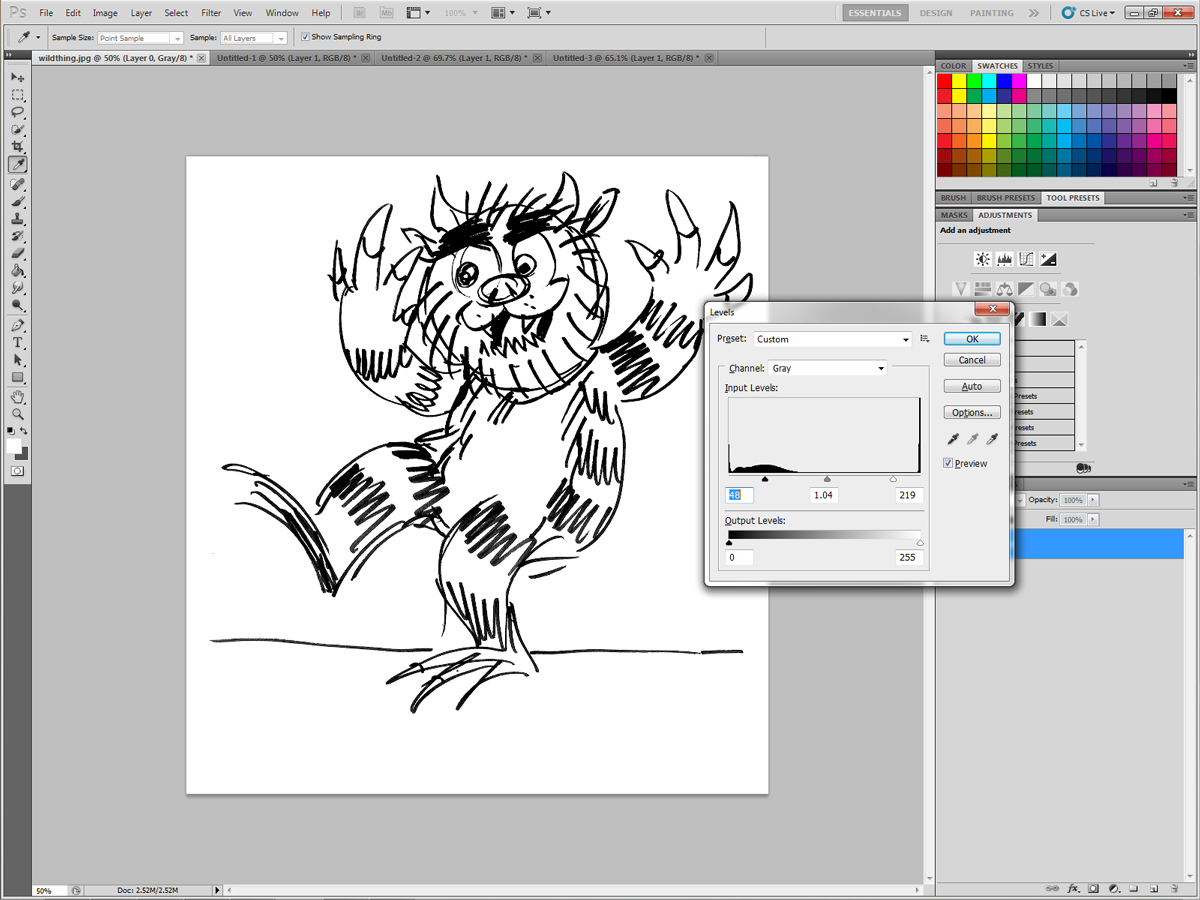
4) Ctrl-L (or ?-L) to open Levels. Move the left (black) and right (white) sliders closer to each other to increase contrast. Experiment until the image looks sufficiently sharp, then press OK.
5) Open Channels palette. There should be only one channel, Gray.

6) Click the round marquee button on the bottom of the Channels palette. This button is "Load channel as selection."
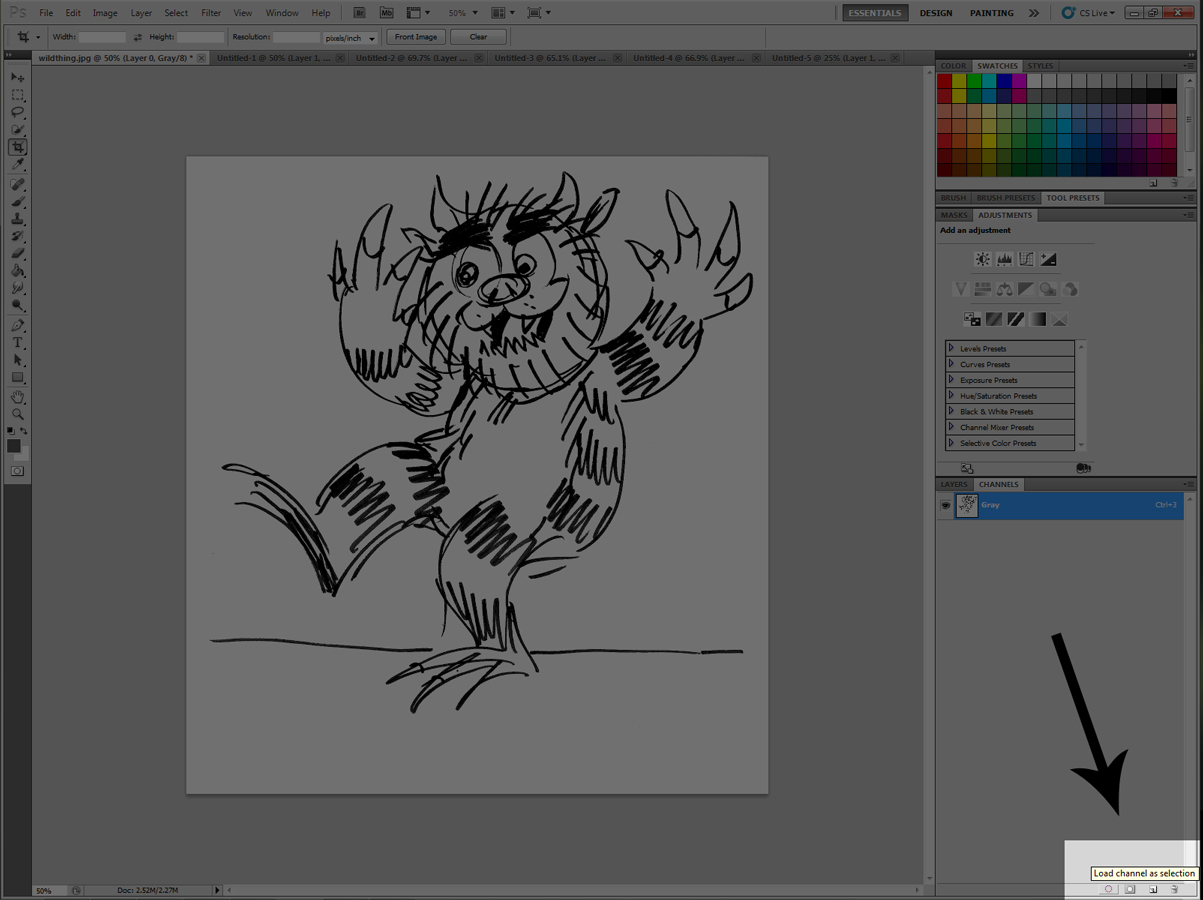
7) All the white elements of the image are now selected.
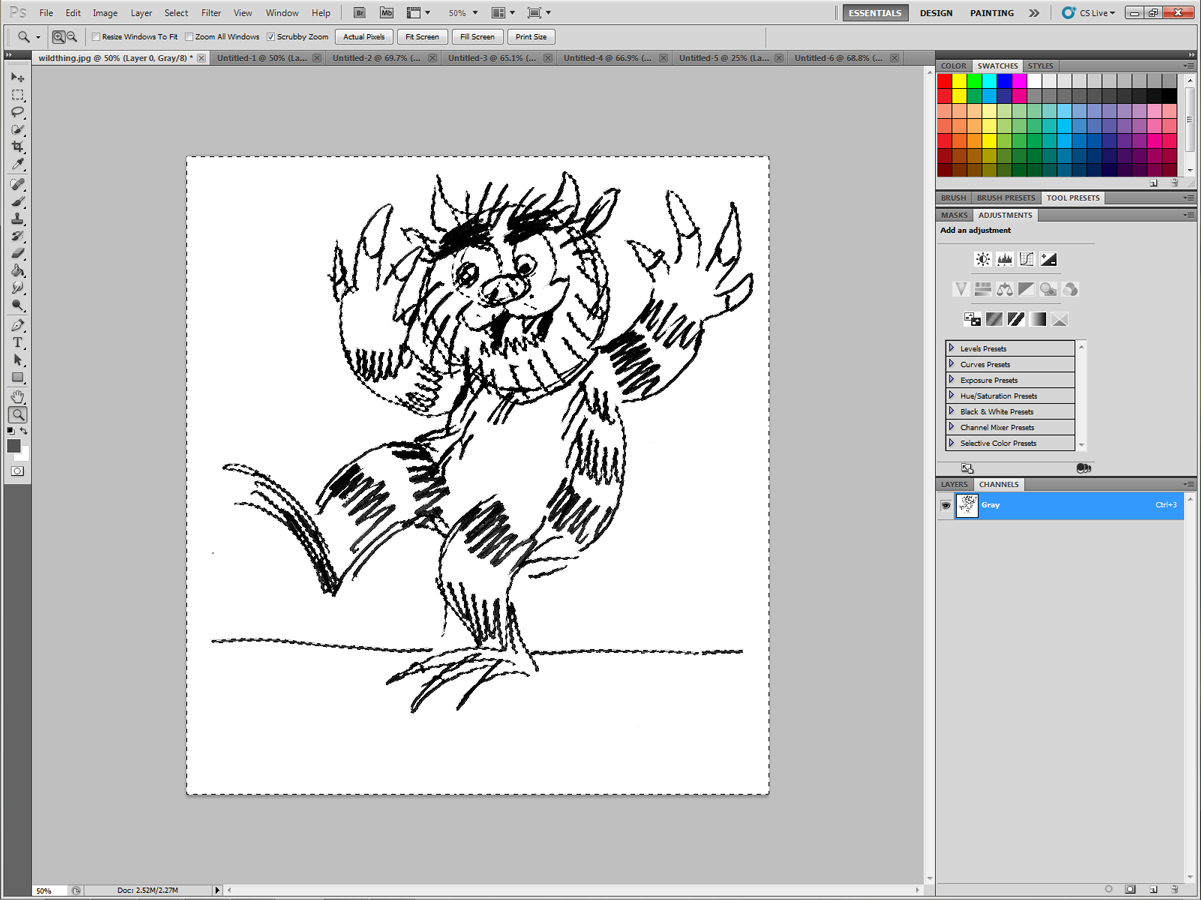
8) Press Backspace or Delete to clear the contents of the selection. You should now see your black lineart on a transparent background. Press Ctrl-D or ?-D to deselect all.

9) Image -> Mode -> RGB (if you intend to color)
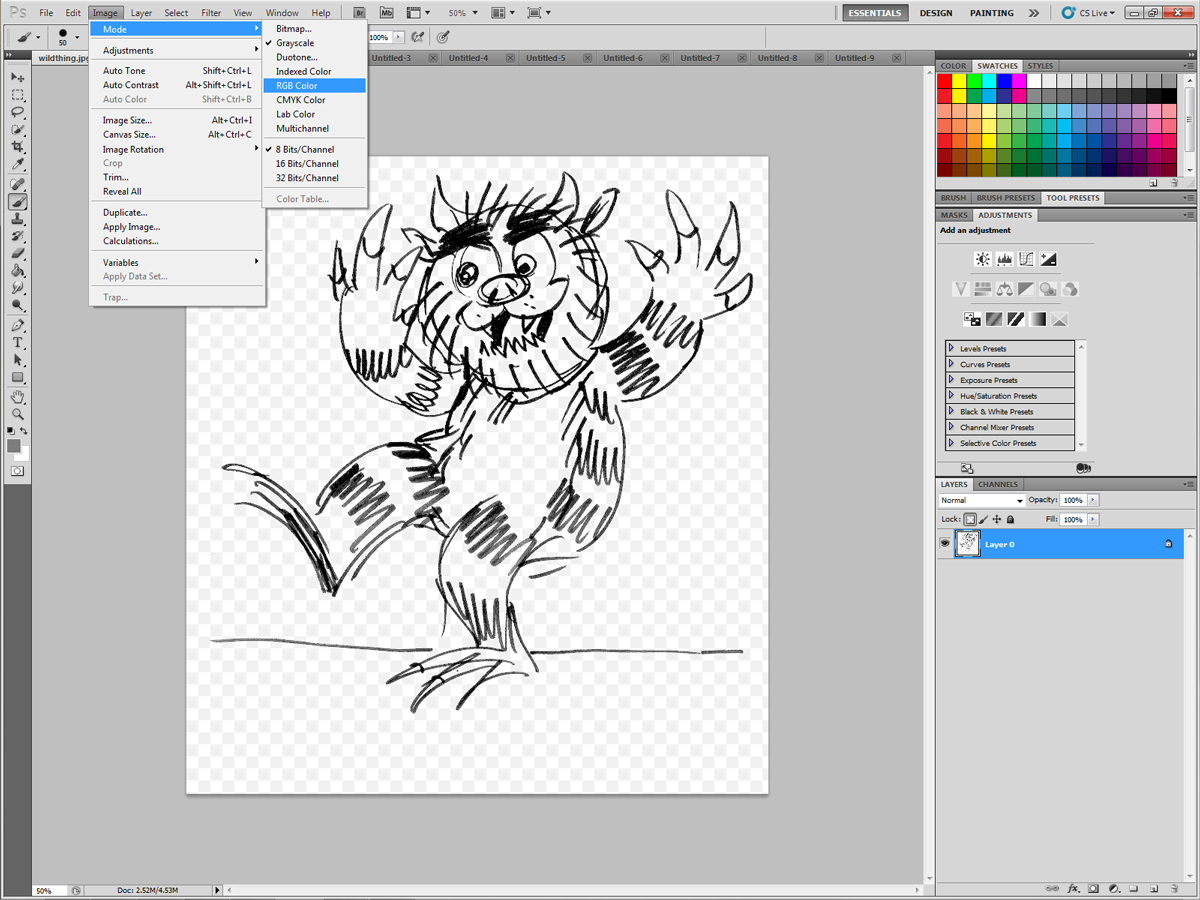
10) In the Layers palette, click the button with the checkerboard pattern. This button is "Lock transparent pixels."

11) You can now color freely on your lineart layer without altering any of the transparent parts.

12) Create a new layer beneath your lineart to color.

(apologies to Maurice Sendak.)